Reddit Is Obsessed With This 80-Year-Old Pie Recipe, And After Trying It Myself, I Completely See Why
I'll never overlook this one fruit in pies again.

One of my favorite subreddits, r/OldRecipes, has been buzzing with a grape pie recipe for the last month. Everyone who’s tried it says they LOVE it, and even though I worked in bakeries for years and I’ve made hundreds of pies, I’ve never made any with grapes.
The original recipe is from 1944, and it was published in Woman’s Home Companion Cook Book. While there was a variety of seedless grapes at that time, seeded ones were more common, which might explain the origin of this recipe.

We’re a bit late into Concord grape season now, so just to let you know, other grape varieties will work fine here. The vintage recipe calls for Concords, but Thomcords (a seedless spin-off of Concords) will absolutely work, too! I used a variety called Kyoho, which is a Japanese hybrid grape that shares some characteristics with the Concord, like slip skins (they slide right off when pinched), a sweet, juicy interior that is sometimes described as “foxy” (lol?), and, of course, seeds. Grape stuff aside, let’s get into the recipe!

Here's everything you'll need:
For the pie/filling:
— Your favorite pie crust recipe (or store-bought pie crust)
— 4 cups Concord or other seeded grape variety (you can use seedless grapes if necessary, with one small adjustment to the recipe outlined below)
— 1 cup sugar
— ⅓ cup all-purpose flour
— ¼ teaspoon salt
— 1 tablespoon lemon juice
— 2 tablespoons melted butter
For the crumb topping:
— ½ cup sugar
— ½ cup flour
— ¼ cup
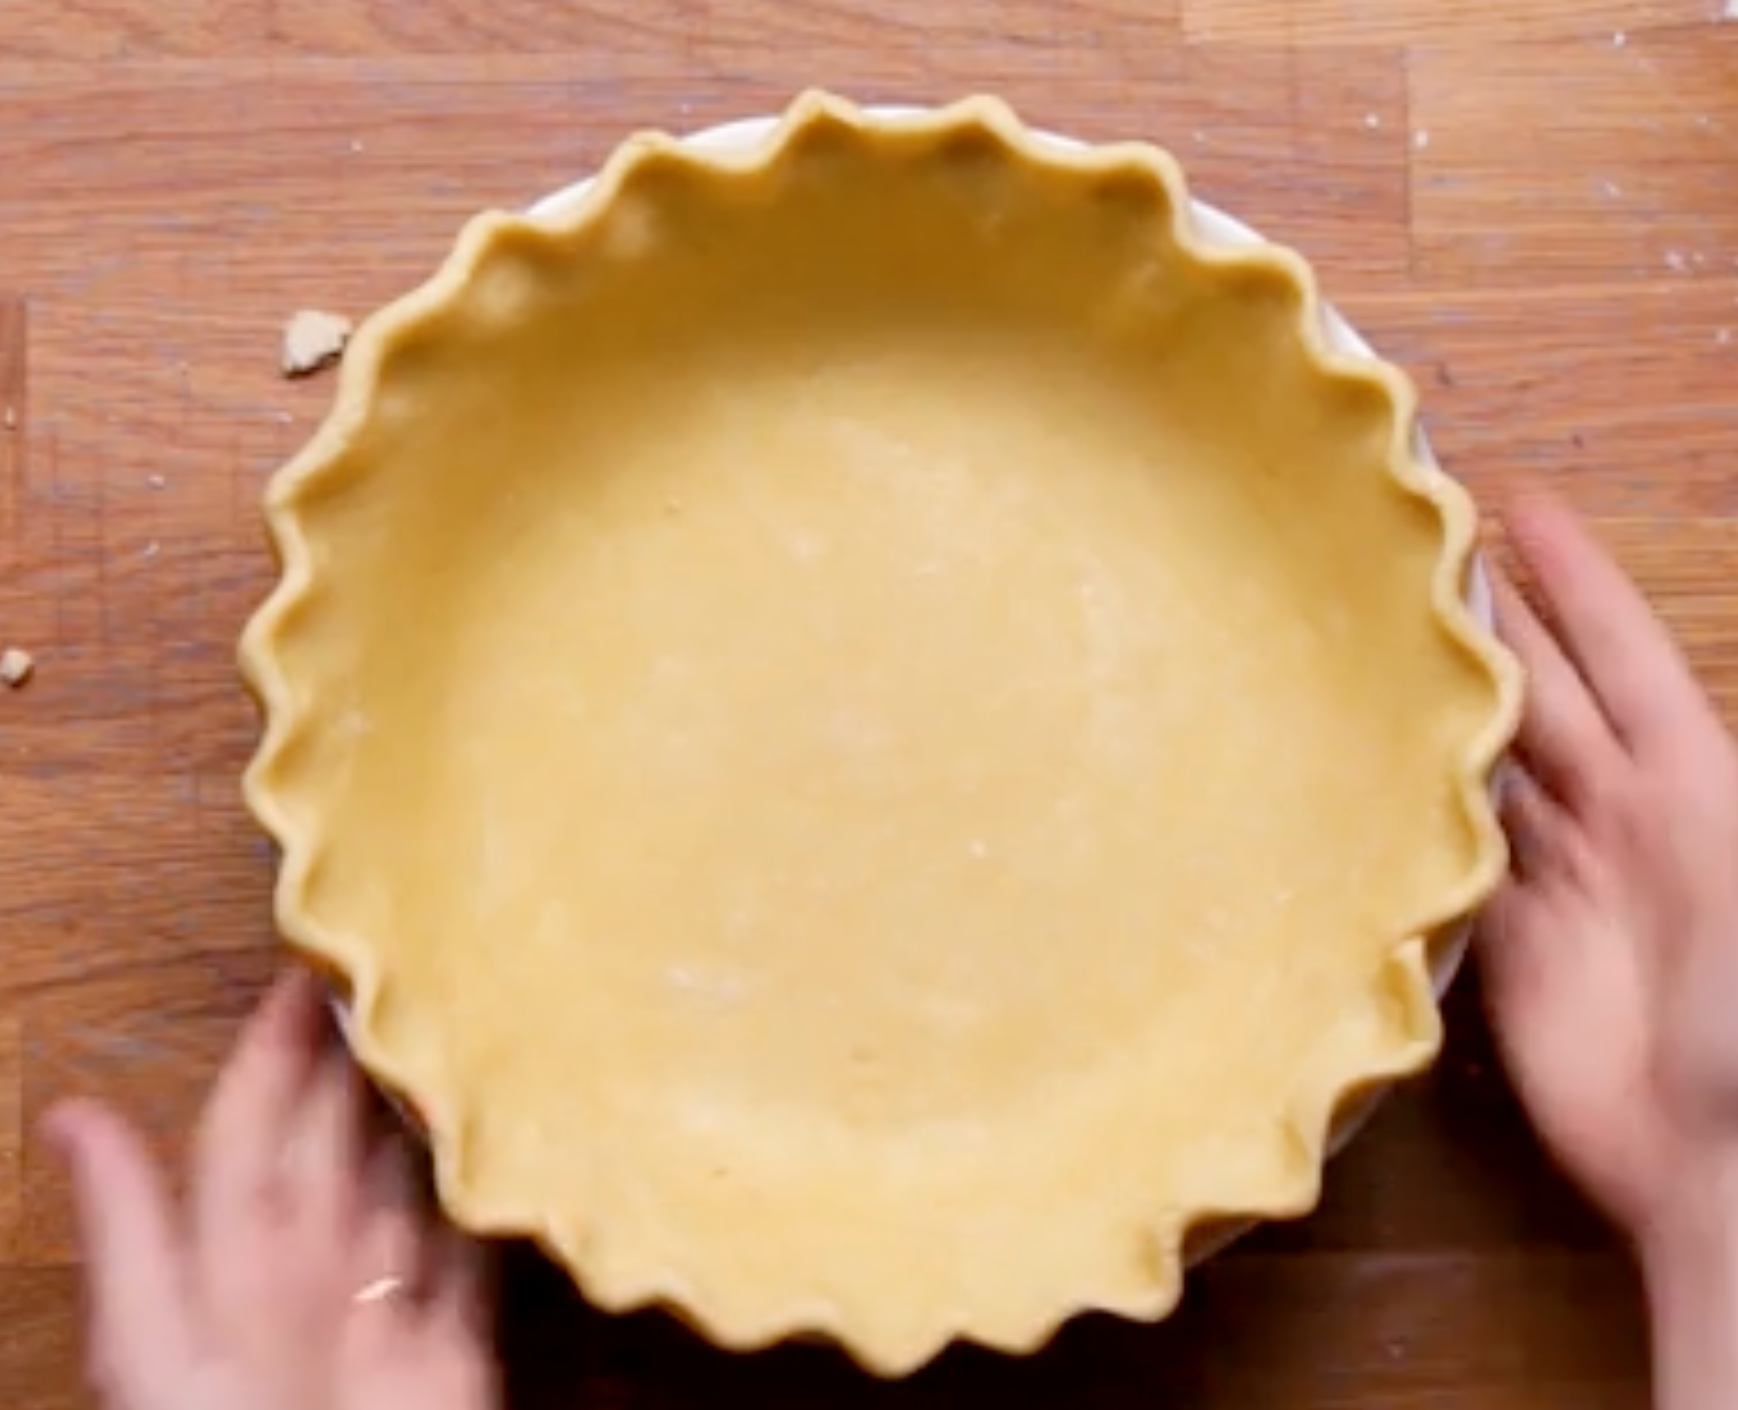
STEP 1: Get your pie crust ready. Use a store-bought crust if you like, or, if you wanna go the extra mile, use a homemade pie crust.

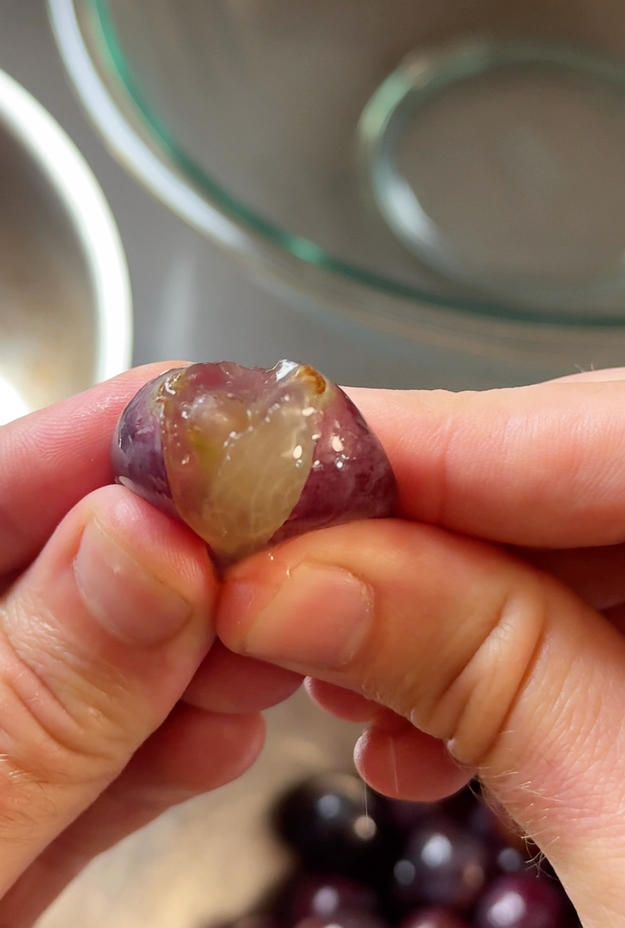
STEP 2: Wash your grapes if you haven’t yet. You need 4 cups, or about 1 ¾ pounds. If using Concord grapes or another seeded grape, this step is essential, so pay attention! Pinch the grapes to slip the skins off, and add them to a bowl for later.
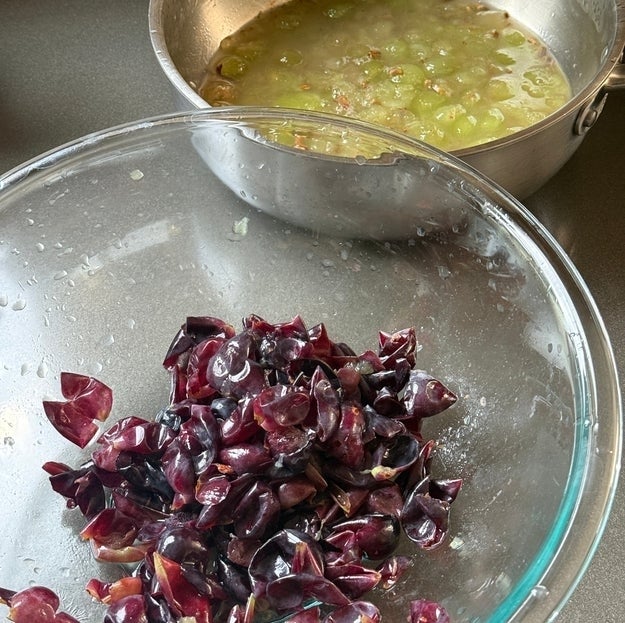
STEP 3: Place the pulp (the insides of the grapes) in a pot and bring them to a boil. Pour this hot pulp over a strainer to remove the seeds. If you’re using a seedless grape, just crush them up with a muddler or pinch them between your fingers — no need to peel them. Preheat the oven to 400ºF while you’re working on this.
STEP 4: Mix the pie filling. Add the cooked grape pulp, grape skins, 1 cup sugar, ⅓ cup all-purpose flour, ¼ teaspoon salt, 1 tablespoon lemon juice, and 2 tablespoons melted butter to a mixing bowl. Stir it all together, then pour it into your pie crust. Place the pie on a baking sheet and bake in the preheated oven for 25 minutes.

STEP 5: While you’re waiting for it to bake, prepare the crumb topping. To make the topping, add ½ cup sugar, ½ cup flour, and ¼ cup (half a stick) butter to a mixing bowl. Cut in the butter (I pinch everything together with my fingertips) until the mixture is crumbly.

STEP 6: After the first 25 minutes are up, pull the pie out of the oven. Carefully, sprinkle on the crumb topping. The pan is gonna be hot, so don’t burn yourself! Pop the pie back into the oven to finish baking, a further 15 minutes.

STEP 7: Let it cool! If there’s any piece of pie advice (pun intended) I can give you, it's this: Let your pies cool! You cannot slice a hot pie; it will fall apart. I typically let pies cool for a minimum of two hours.

STEP 8: Slice and enjoy your grape pie!

Honestly, I love this pie, and I can see why it's gained internet popularity. It's an off-the-wall flavor that most people probably haven't made before, and I definitely think it's worth baking! The crumb topping was perfectly crisp and paired really well with the grapes, and I'm obsessed with the color. It's giving Welch's Grape Juice, in a good way that reminds me of my childhood juice boxes.

Would you try grape pie? Let me know in the comments!
Looking for a quick and easy pie crust recipe for your grape pie? Download the free Tasty app to cook our perfect pie crust in step-by-step mode — no subscription required.